Houzz 3D Floor Plan Rendering
Houzz
+5.6%
overall activation YoY
3.6K+
monthly renders
Role: Product Designer
Team: 1 Product Manager, 4 Engineers, 2 3D Artists, 1 Data Scientist
Helping pros and homeowners visualize home design projects.
Houzz's 3D Floor Plans is a simple home design tool for pros like interior designers and general contractors. Pros can do everything from planning out home remodeling projects, arranging and sourcing furniture, and viewing interior redesigns in augmented reality.
In 6 months, my team and I delivered a camera creation and photorealistic rendering experience that enable pros to frame compositions and generate life-like visualizations of their 3D floor plans.
Problem
Pros don't have the tools to help their clients visualize the outcome of a home remodel
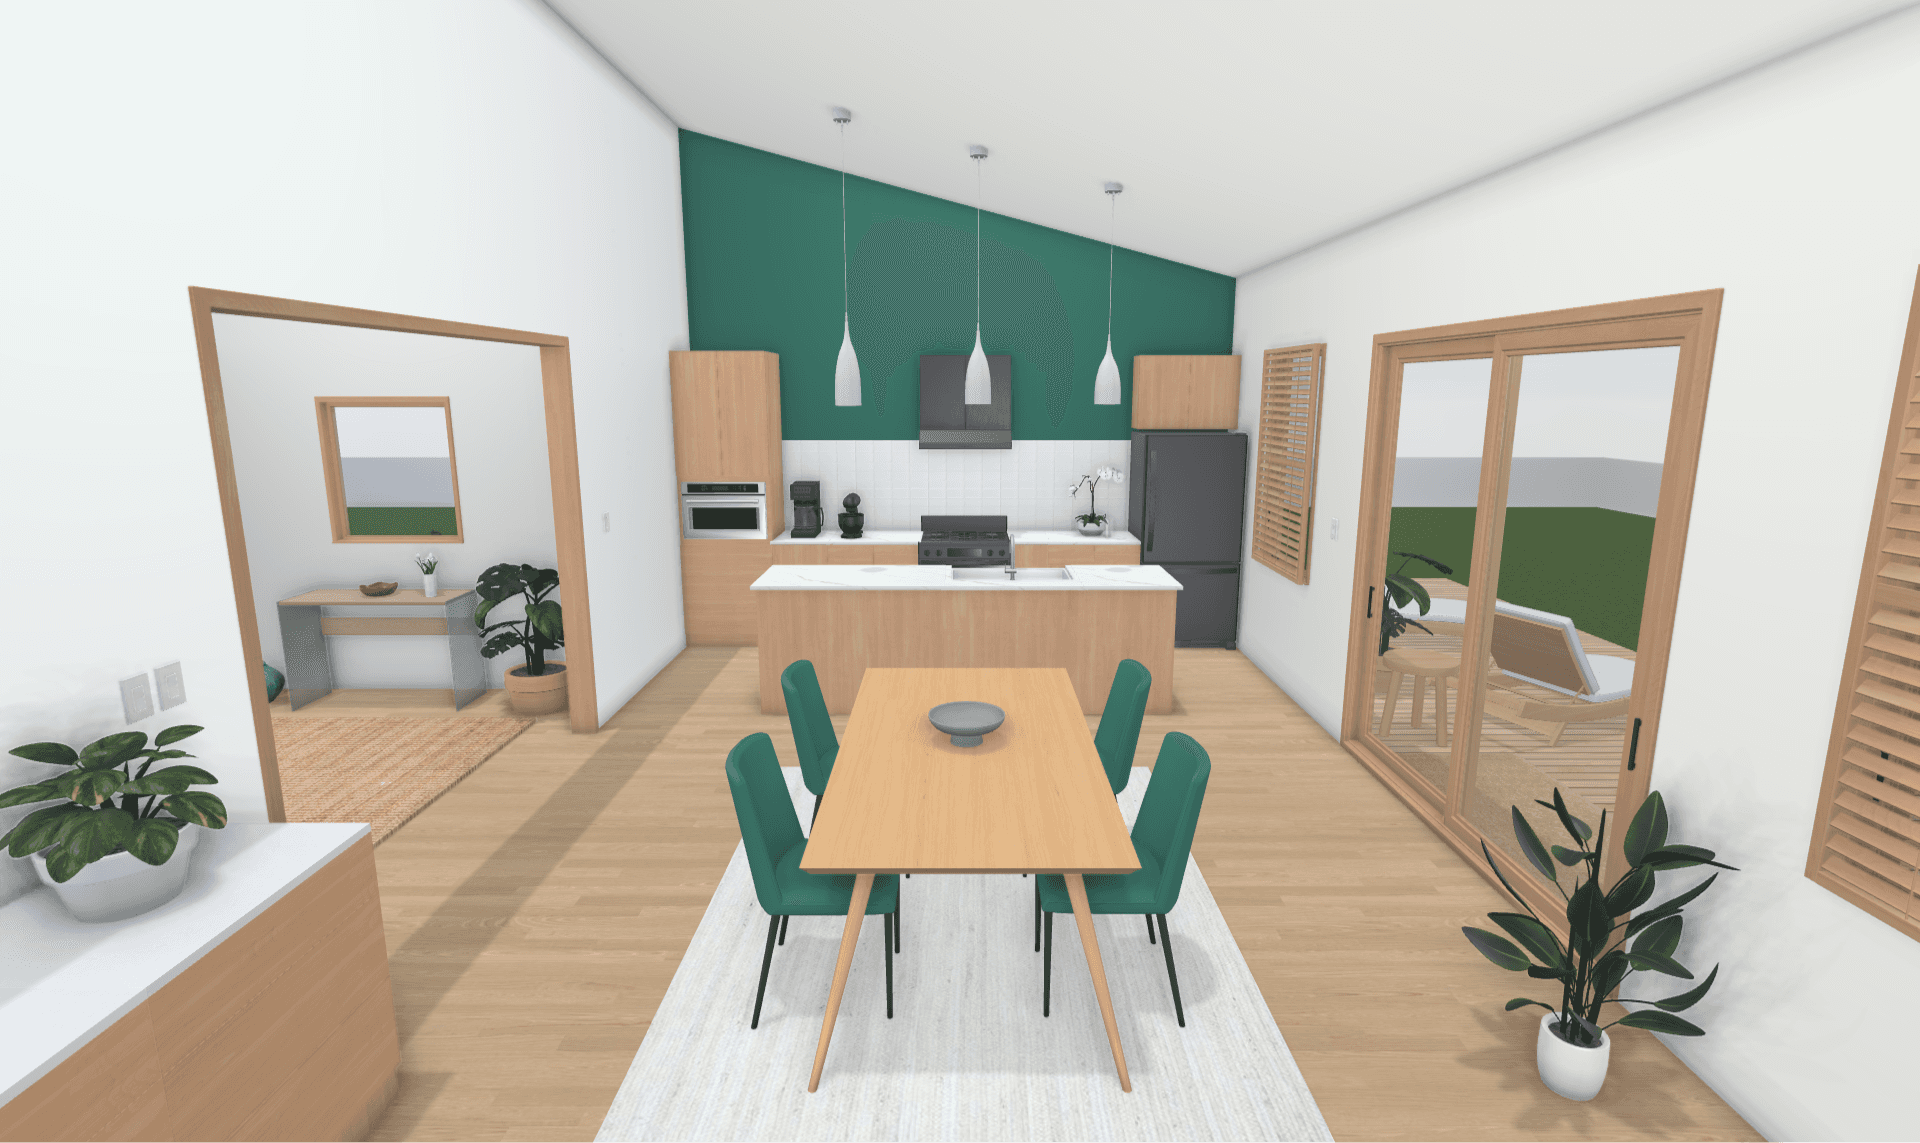
Pros will begin drafting up concept designs within Houzz's 3D Floor Plans after consulting with homeowners on their remodeling vision. Once they're done, pros share screenshots of the final designs with the homeowners. Unfortunately, these screenshots lack photorealism as they don't convey proper lighting, shadow, and depth.
Pros are sharing screenshots of the editor with clients to showcase their final design vision
Like all other 3D tools, a 3D scene first has to be sent through a rendering engine that post-processes all the details like textures and reflections to generate true-to-life visuals. Because Houzz doesn't have a rendering service, pros have no other options besides sharing screenshots of their editor.
Because remodeling a home is such a big time and financial commitment, most homeowners don't feel comfortable proceeding unless they have a clearer picture of the outcome. As a result, our pros were losing clients, and we were losing pros.
Objective
Deliver a photorealistic rendering service in 6 months
Given that photorealistic rendering is a capability that has been available in mainstream 3D tools for years, many of our pros expect this service to be part of our tool. Rendering has been one of the top customer requests since product launch.
Our objective was to close this gap by delivering a photorealistic rendering service in order to meet our pros' needs and increase our product activation and retention rates.
Additionally, the International Builders' Show - the largest industry tradeshow in the US - was coming up in 6 months, and it was a chance for Houzz to make a strong impression on potential customers. Because 3D Floor Plans is Houzz's most popular product, leadership wanted to lead their new feature launches with new rendering capabilities at the show.
Kickoff & Research
I gathered past feedback to better understand our customer needs and expectations
Because of several challenges, I was not able to speak with pros. Instead, I reviewed previously recorded customer calls, feature request tickets, and discussions with customer support teams who were all very familiar with our pros' struggles.
In those recordings, my PM and I saw several examples of screenshots that pros were sharing. None of them resembled realistic high quality images of homes.
Examples of our 3D editor visuals (not real customer projects for privacy reasons)
Among the research we gathered, one insight really stood out:
Pros are struggling to compose the screenshot image they want because it is hard to use our controls
They spend a lot of effort trying to move around in 3D, aligning their view, and focusing on specific points of interests. We were curious about what was so challenging with taking screenshots. Through replays of pros using our tool, we discovered that:
It's easy to confuse controls
Our single select tool performed 7 different actions depending on the mode or selection. Sometimes the control might move the user forward, and other times backwards. It was inconsistent across our three modes and pros could never expect what was going to happen when they clicked and dragged.
Many controls in one - pros found our controls to behave unexpectedly and unnaturally
It's easy to get lost in 3D space
Our controls (especially if using a trackpad) were very sensitive. If a pro accidentally scrolled too fast, they would end up hundreds of meters away from the floor plan with no easy way to get back.
"Wait… where am I? Where did my floor plan go?"
It's hard to manipulate the 3D viewer
Pros want to guide the viewer's eye and highlight focal points of the remodel. However, it was troublesome getting the right composition because it took a lot of time and effort zooming, panning, and rotating in 3D. It was impossible to align a centered view.
Trying to focus on the TV takes a lot of uneccessary movement
After capturing our findings, I researched several 3D design tools and touring apps to get a perspective of how they tackle rendering and 3D navigation
Fun fact: my PM used to be an industry pro (architect) and I used to be a 3D artist, so we were both very familiar with 3D tools and the rendering process. However, as a 3D artist, I never paid much attention to how the controls worked or what the render experience was like. So I decided to document and compare 3D industry tools against consumer floor planners.
I also looked into 3D touring apps like Google Map's street view and virtual apartment tours, which gave me a lot of inspiration.
A competitive analysis of different 3D experiences from rendering to navigation and wayfinding
This turned out to be a great exercise studying all the controls at a micro level and being hyper aware of how each mouse and trackpad action correlates with which navigational behavior.
At this point, we realized that this project was more than just enabling pros to generate photorealistic images, it was about the usability of our controls and wayfinding
A typical process for setting up a successful render was 90% framing the composition, 5% customizing render settings, and 5% reviewing the render output and deciding if they needed to redo it.
And given that this rendering experience would be our first 3D-exclusive feature, if pros were struggling to move in 3D to frame a composition, our feature was going to fail.
Additionally, one of our engineers pointed out that the rendering engine we would use charges Houzz for every image that gets processed. In order to avoid unnecessary costs, we would want pros to get the right composition as often as possible without retries.
This changed our perspective and our PM put a lot of emphasis on improving the controls so that our pros could successfully move on to the next step.
User Flow
Drawing inspiration from competitor apps, I mapped out the experience of setting up and rendering the view
I created two major user flows for how pros would set up their views and then submit it for rendering.
Our engineers were split according to these tracks. One team of engineers would work on improving our 3D navigation and setting up camera compositions, while the other team would focus on the render customization and results.
User flow of setting up views and rendering images
Brainstorming & Concept Design
To address the usability issues with our controls, I created spreadsheets comparing competitor controls with ours
The first spreadsheet tracked how each mouse action behaved in other tools. This helped the team get a perspective of what the more common behaviors might be.
Backed by the common behaviors established in the first spreadsheet, I remapped all the controls into a second spreadsheet, where I shared these proposals with my team.
Spreadsheet of the proposed changes
At the same time, I began conceptualizing the end-to-end experience and the camera UI
Further drawing inspiration from the competitor tools, I began visualizing how pros would onboard into the feature, set up cameras, customize their render settings, submit for rendering, and review images.
Early concept designs
Validation
The engineers and I built prototypes so we could run internal tests to fine tune interactions
I found myself at a roadblock when trying to decide between two options for creating and customizing cameras. I decided to create prototypes and had teammates (who had never used our 3D tool before) run through internal tests. I got valuable feedback on how they tried to complete these tasks, which ultimately informed my decision.
One of the usability tasks of generating a render
The engineers also implemented my proposed controls into our staging environment so that we could test how they felt. We used feedback from our testing sessions to continue fine tuning the sensitivity and behaviors of the controls.
Design
After making adjustments, we held a formal design review with our senior leadership team before committing to dev ready
I created a deck to share with leadership and the wider product organization. We received great feedback that sparked a lot of excitement and discussions. Our marketing solutions unit saw lots of great opportunities for pros to market photorealistic images on their business profiles to win more leads.
Once we got the greenlight, I finalized all the designs and collaborated with the engineers on implementation.
Final design specs that were handed off to engineers
MVP
The final designs that shipped in our MVP
Remapped, 1-to-1 controls
Our controls were remapped and consolidated according to apps our pros were most familiar with. This made them much more natural and forgiving to use.
I also split up the controls in the toolbar so that they had straightforward 1-to-1 actions. Previously, the single Select tool housed seven different actions. Now, they were surfaced as individual controls and they behaved consistently across our three modes.
New 1-to-1 controls for panning and rotating within the editor
Point and click to focus a view
Since 90% of the entire experience is setting up the right image composition, I added new point and click interactions so that pros can easily focus on a piece of furniture or wall. This automatically repositions their camera view to center align on what they clicked on.
New interactions where pros can click on a wall or object to focus their camera on it
Viewpoint bubbles
To make traversing the 3D scene a little easier, I also introduced viewpoint bubbles. Whenever the pro saves a camera view, they have the option of turning it into a viewpoint bubble, where they can jump between curated points of interests without all the unnecessary movements in between.
New interactions that allow pros to quickly navigate to a point of interest
Reset view
In situations where pros get lost, the system now notifies them when they are outside the boundaries of their floor plan so that they have an easy way to return to the origin.
A message appears with an option to reset their view whenever the pro leaves the floor plan boundary
Camera UI
A new camera UI overlay was introduced to help pros frame their image composition. In the side panel, pros can customize their camera view by adjusting for perspective warping, field of view, and camera positioning. Once the pro is happy with their composition, they can click the blue button to initiate the render process.
New camera UI overlay and settings panel to create and edit cameras
Render results
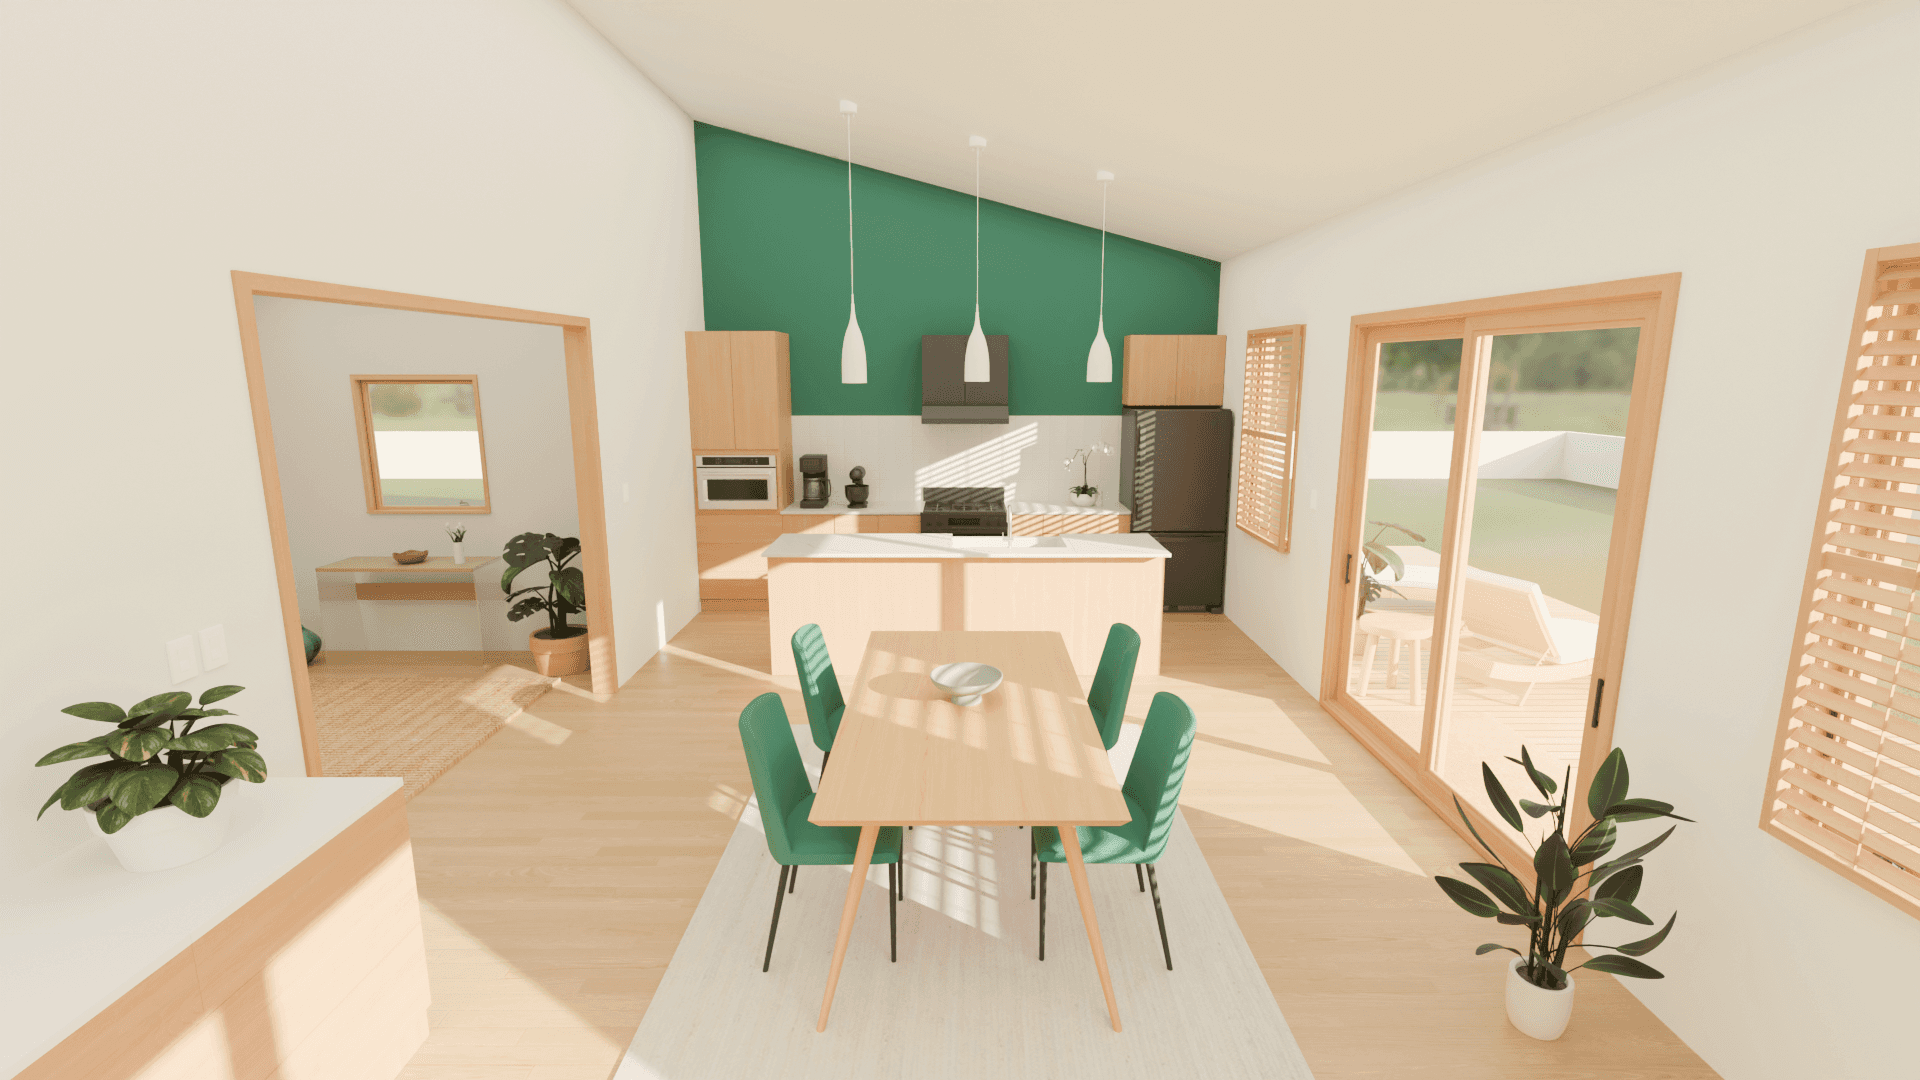
Generating photorealistic images
It was a very challenging task for our graphics engineers and 3D artists to set up the render engine. Because pros can create floor plans in ways we don't expect, such as rooms with no floors or ceilings, or rooms with no windows to let light in, it was hard to set up the rendering algorithm that produced good results in all scenarios.
The current photorealistic image outputs are the results of several months exploring optimal lighting positions for all types of floor plans, checking for color accuracy, and adjusting materials like glass to reflect more realistically.
Before
After
The rendering output is still a work-in-progress even after launch. The team continues to meet weekly to make improvements that deliver even better photorealistic results.
Photorealistic rendering launched in February 2024
After six months, we announced this new feature at the International Builders' Show in Las Vegas. This new photorealistic rendering feature contributed massively towards new contracts signed that same day.
Houzz booth at the International Builders' Show 2024 where rendering was announced (Photo: Houzz)
After a controlled rollout, our team has seen a 5.6% increase in total activation rates YoY. Pros are generating an average of 3,600+ renders per month. Additionally, we've seen 0 new complaints come in about our revamped 3D controls!
Reflection & Next Steps
It has been awesome hearing from pros how happy they are to finally be able to share more life-like visuals of their floor plans with clients. While the MVP has now been in the hands of our pros for a few months, we still have a lot of work to optimize usability and wayfinding, as well as the rendering results. We also can't wait to introduce more customizations like time of day (light position), outdoor/sky backgrounds, and image dimensions!
It's been a very rewarding project to work on, especially going back to my roots as a 3D artist and bringing 3D environments to life. My PM and I drew a lot of inspiration from our past frustrations with 3D cameras and rendering to deliver a feature we hope will greatly improve our pros' workflows.